Getting started: a 10-minute tour of firelet.media Gallery
Attach a folder, let the scan finish, then filter, search by description and open the viewer. A quick tour of the title bar, icon rail, toolbar and grid.
On this page
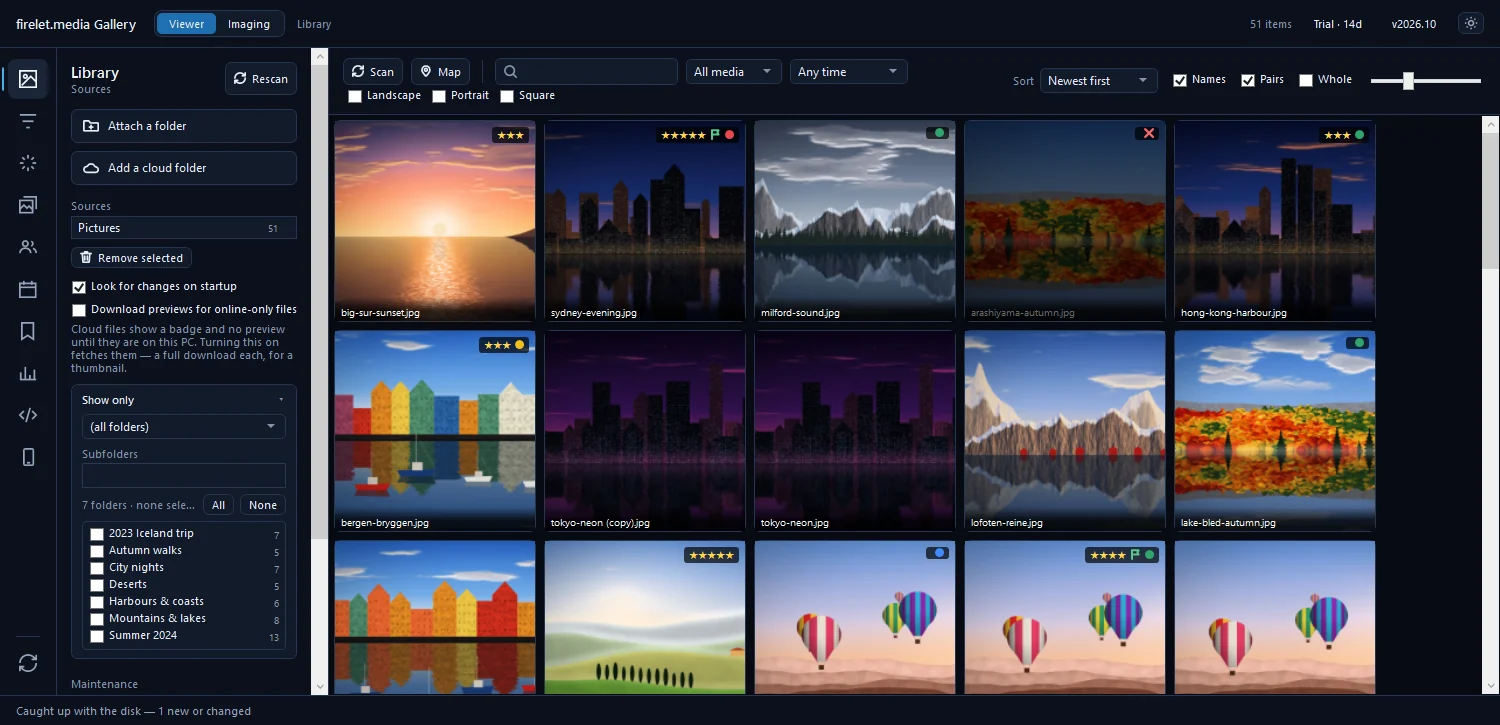
Here is how to use firelet.media Gallery in about ten minutes: open Library (Alt+1), click Attach a folder and let the scan finish. Your photos stay exactly where they are. Then narrow the grid with the toolbar and Filters, index the library so you can search by description, open a picture in the viewer, and start rating and making albums.
How to use firelet.media Gallery: the layout
The window has five parts. Once you know them, everything else is a panel away.
- Title bar. The Viewer tab (Ctrl+1) is for browsing; the Imaging tab (Ctrl+2) is for scanning and importing. On the right you'll see the item count, the licence label (it reads Trial · 14d on day one), the version (v2026.10, which opens About) and a button that switches between the dark and light theme.
- Icon rail. The column of icons on the left opens the panels. Reset filters sits at its foot.
- Side panel. Whatever the rail has selected: folders, filters, AI tools, albums and so on.
- Toolbar and grid. The toolbar across the top holds Scan, Map, the search box, the sort order and the tile size. Below it is the grid of your pictures.
- Status bar. Progress, the number selected, and Stop: "Stop what is running. What it had already done is kept."
| Key | Panel | Key | Panel |
|---|---|---|---|
| Alt+1 | Library | Alt+6 | Calendar |
| Alt+2 | Filters | Alt+7 | Presets |
| Alt+3 | AI | Alt+8 | Statistics |
| Alt+4 | Albums & keywords | Alt+9 | Advanced query |
| Alt+5 | People | Alt+0 | Devices |
Step 1: attach a folder
On the very first launch the grid is empty and grey, the rail is open on Filters, and the title bar says "No images yet — add a folder to begin".
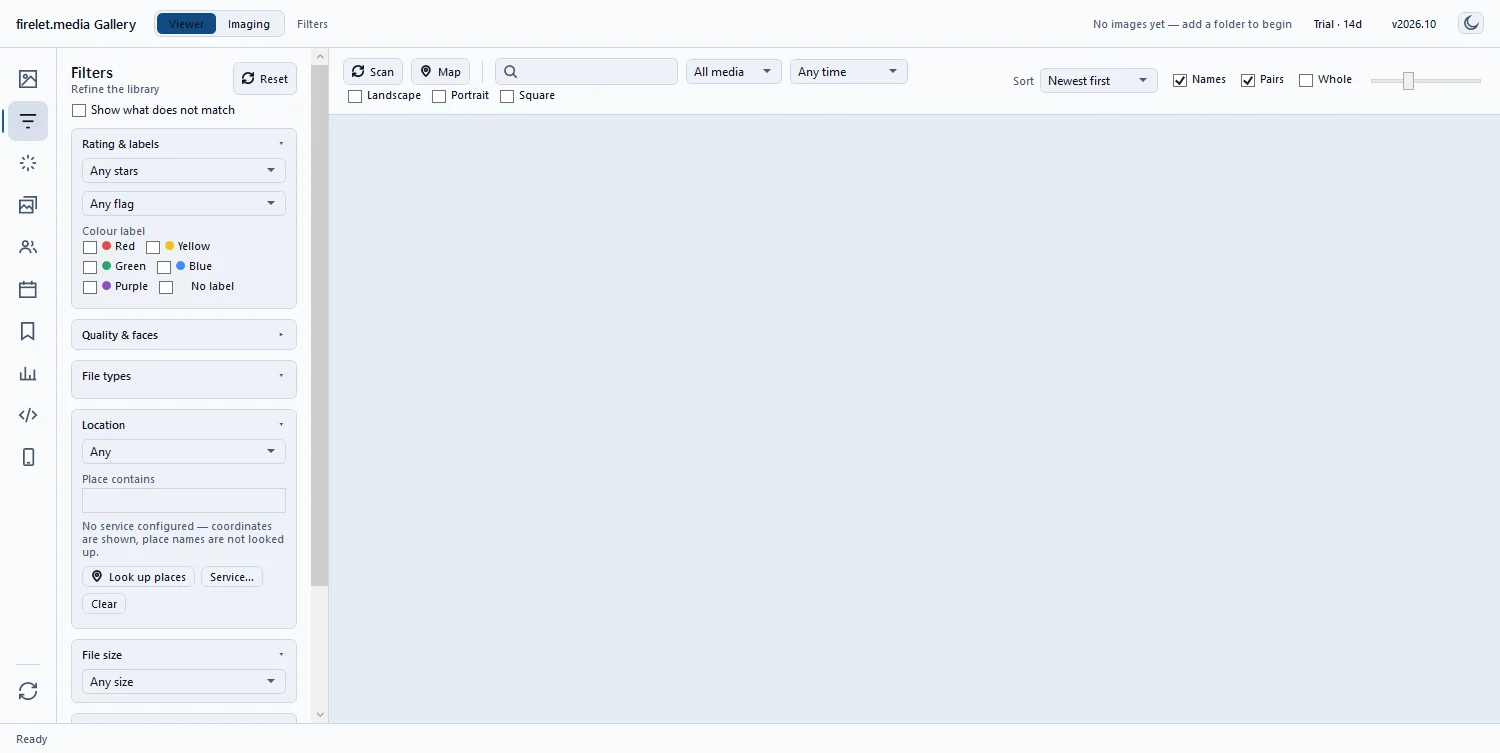
- Press Alt+1 to open Library.
- Click Attach a folder.
- Pick one or more folders in the "Add a folder to the library" window and confirm.
- Wait while the status bar runs through "Scanning…", "Reading metadata…" and "Saving…".
Nothing is moved, copied or uploaded: the gallery reads the folders where they are. For OneDrive, Dropbox, Google Drive or iCloud, use Add a cloud folder instead. The gallery doesn't watch folders live; it looks for changes each time it starts (Look for changes on startup is on) and whenever you press Scan. How to add your photo folders covers the details, including camera RAW files, which aren't supported yet (the JPEGs your camera writes alongside them are).
Step 2: browse and filter
The toolbar handles the everyday narrowing:
- Search box. Type a few words. Every word must match somewhere: a file or folder name, keyword, album, person, place, title, or text read from the picture.
- All media / Photos only / Videos only, and a date range from Any time to Custom range….
- Landscape, Portrait and Square tick boxes.
- The sort order, from Newest first to Highest rated.
- Names and Whole change how tiles look; the slider (or Ctrl+mouse wheel) changes their size.
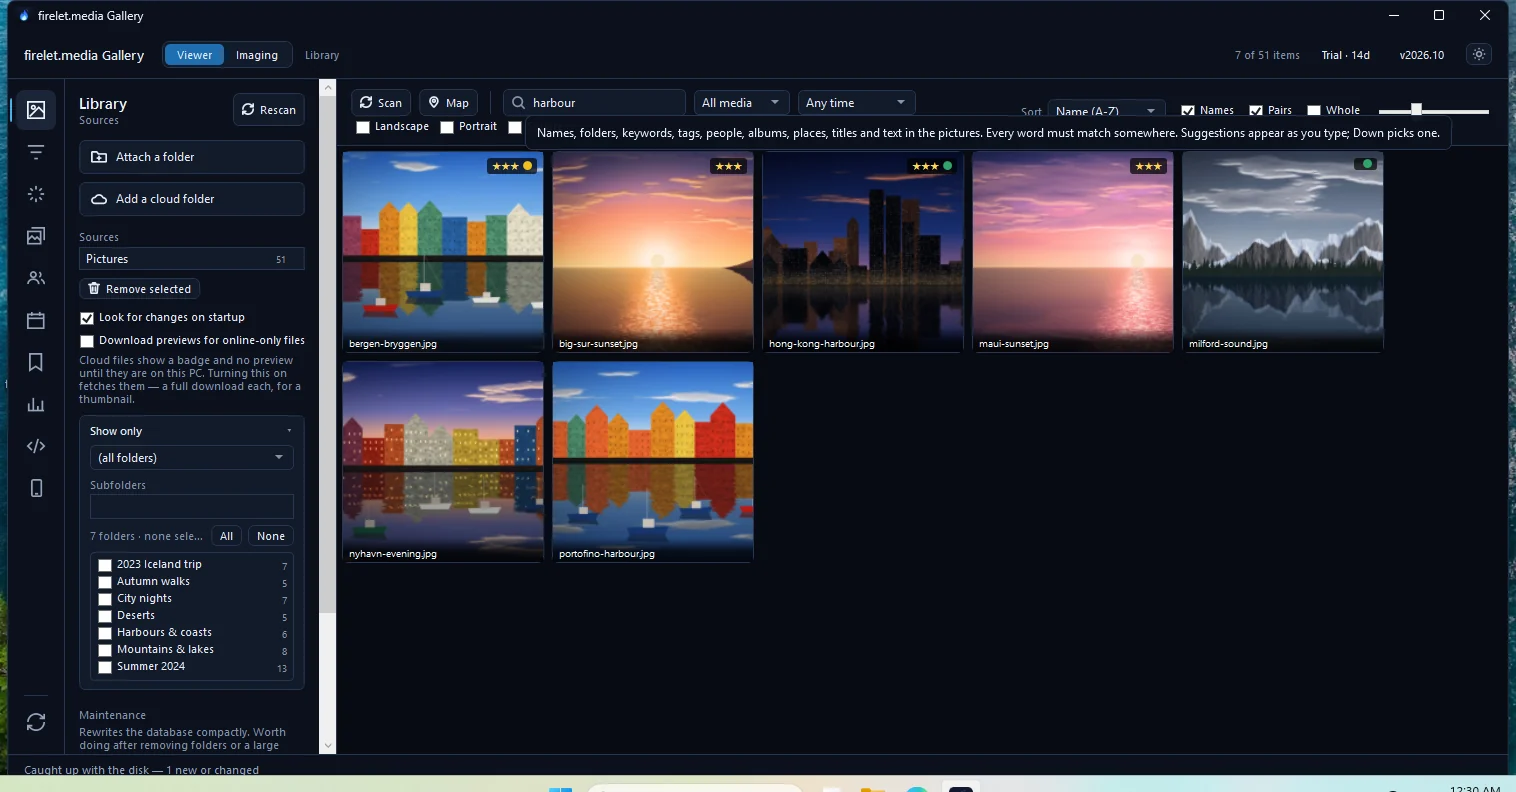
For stars, labels, file types, location, size and camera, open Filters (Alt+2). How to sort and filter your photo library explains every control.
Step 3: index and search by description
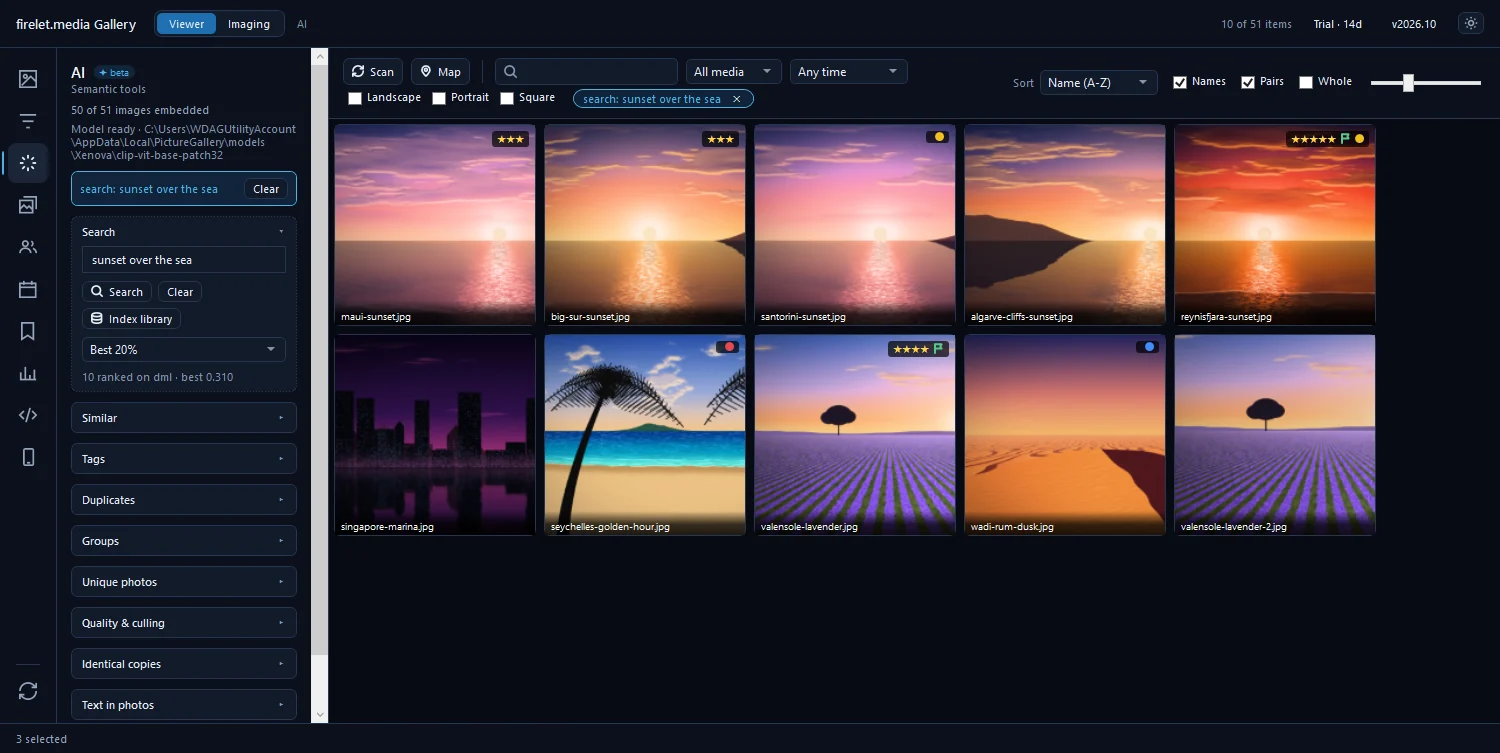
To find a photo by describing it ("boats in a harbour at dusk"), the gallery needs its AI model and an index of your pictures. Both stay on your PC.
- Press Alt+3 to open AI (it carries a "✦ beta" badge).
- Click Download model. It is a one-time 438 MB download from Hugging Face.
- Click Index library and let it run.
- Type a description into the AI panel's own search box and press Enter.
Descriptions work in English. Indexing uses your graphics card when it can and the processor otherwise; the results are the same either way. How to index your library for AI search has the full picture.
Step 4: open the viewer and edit
Double-click a tile, or select it and press Enter. Use ← and → to step through the grid, I for the info panel (rating, title, keywords, date, place and more) and E for Adjust, the editor. Esc backs out one step at a time until the viewer closes.
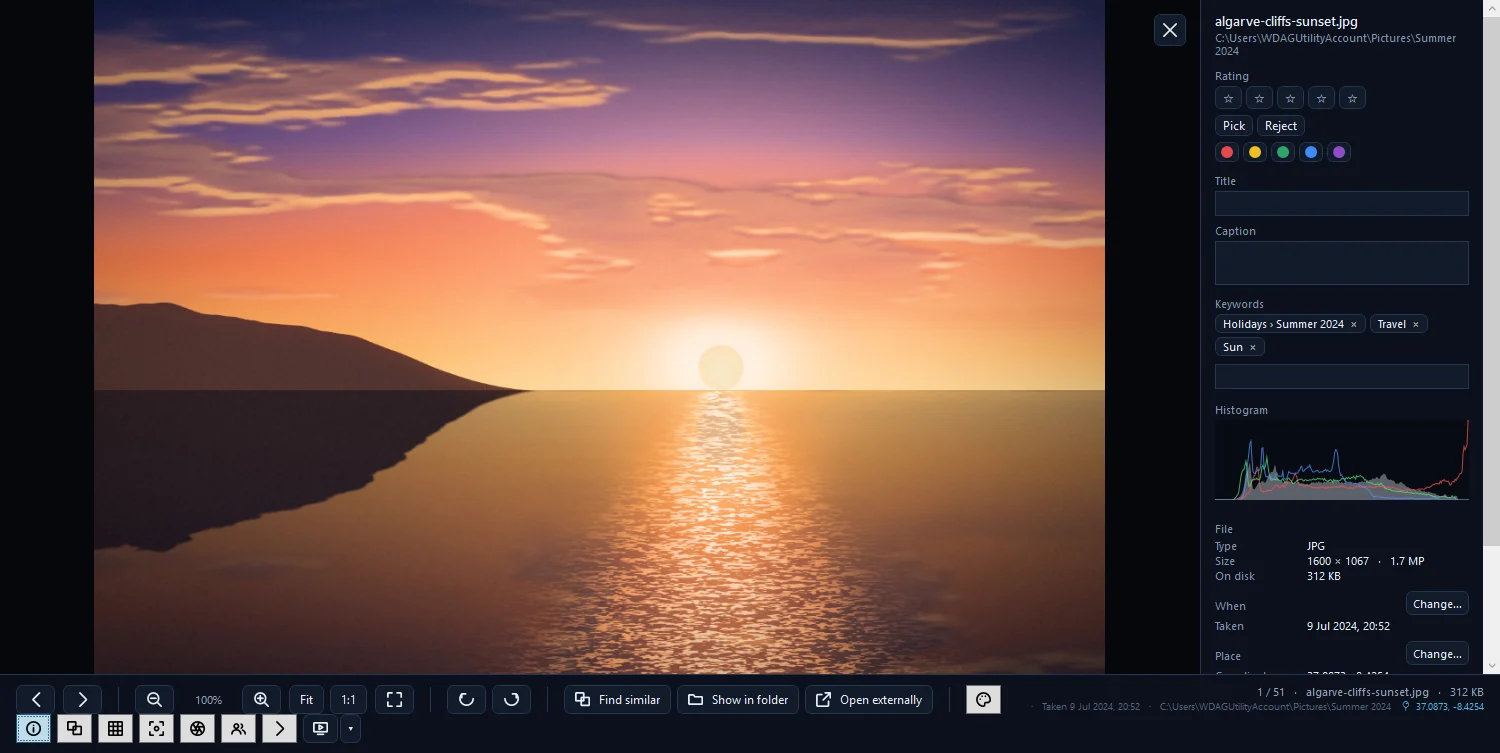
Edits are saved in the library as you go and never change the file. How to edit a photo without changing the original shows each slider.
Step 5: rate, label and make albums
With pictures selected in the grid or open in the viewer:
- Press 0–5 for stars (0 clears), P to pick, X to reject and U to clear the flag.
- Press 6, 7, 8 or 9 for a red, yellow, green or blue label.
- Open Albums & keywords (Alt+4), type an album name and press Enter: the album is created with the selected pictures in it. Ctrl+K adds a keyword.
Albums are lists in the library, so no files are copied, and a picture can be in as many albums as you like.
Where to go next
- The free trial runs 14 days with every feature and no limits; the licence label counts down the days.
- Want to see where photos were taken? Click Map on the toolbar.
- Pair an Android phone under Devices (Alt+0) when the free companion app is available (it is coming soon).
Questions people ask
Why is the grid empty after install?
The library starts empty and the icon rail opens on Filters. Open Library (Alt+1), click Attach a folder, and the scan fills the grid.
Where are the settings?
There is no single settings window. Each option lives in the panel it affects: Library for scanning, the map's Tile provider… for map imagery, and each phone's Settings… for the Wi-Fi link.
How do I switch between browsing and scanning?
Use the Viewer and Imaging tabs in the title bar, or press Ctrl+1 and Ctrl+2.
Was this article helpful?
Thank you — that is counted, and nothing else about you is. Still stuck? Ask a person.