How to use the photo viewer: zoom, info panel and slideshow
Double-click a tile or press Enter to open the viewer. Use the arrows to step, Fit and 1:1 to zoom, I for the info panel, and F5 for a slideshow.
On this page
The firelet.media Gallery photo viewer opens when you double-click a tile or press Enter. Step through pictures with ← and →, zoom with Fit and 1:1 (or + and −), press I for the info panel with ratings, keywords, dates and camera details, and press F5 to start a slideshow. Esc closes it again.
Opening and closing the viewer
- Double-click a tile in the grid, or select it and press Enter. (Right-click → Open works too.)
- Press → and ← to step to the next and previous picture.
- Press I to show the info panel.
- Press Esc to close the viewer.
The viewer fills the window and steps through the pictures the grid is showing, in the grid's order. So sort or filter first if you want to view one album, one day or one search result.
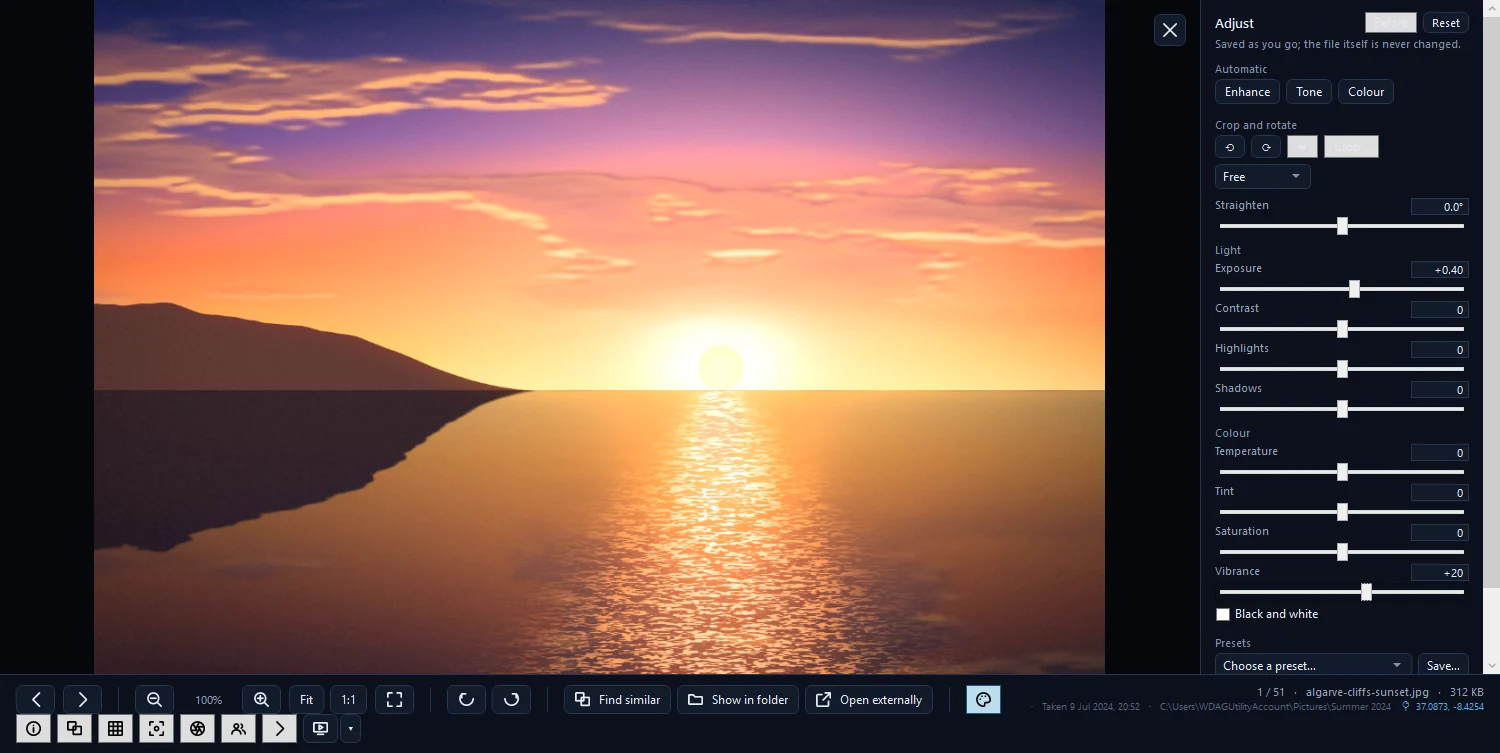
To close it, click the ✕ at the top right ("Close viewer") or press Esc. Esc backs out one step at a time: it cancels a crop, then closes the editor, stops a slideshow, leaves full screen and finally closes the viewer.
The viewer's caption line shows where you are and what you're looking at, for example "12 / 340 · IMG_0412.jpg · 4.2 MB", then the pixel size, the date taken and the folder. If the photo has a location, a link there opens it in your browser on Google Maps.
Photo viewer zoom: stepping, Fit and 1:1
| Action | Keys or button |
|---|---|
| Previous / next picture | ← / →, or Previous and Next |
| First / last picture | Home / End |
| First picture of the previous / next day | Ctrl+← / Ctrl+→ |
| Zoom in / out | + / −, or scroll the mouse wheel |
| Fit to window / actual pixels | Fit and 1:1, or Z to switch |
| Full screen | F, or Fullscreen |
| Filmstrip | T |
| Turn the view | R and Shift+R, or Rotate right and Rotate left |
For checking focus and exposure, the toolbar also has Thirds grid (G), Focus peaking (K; right-click it for colour and sensitivity) and Clipping warnings (J), which paints blown highlights red and crushed shadows blue.
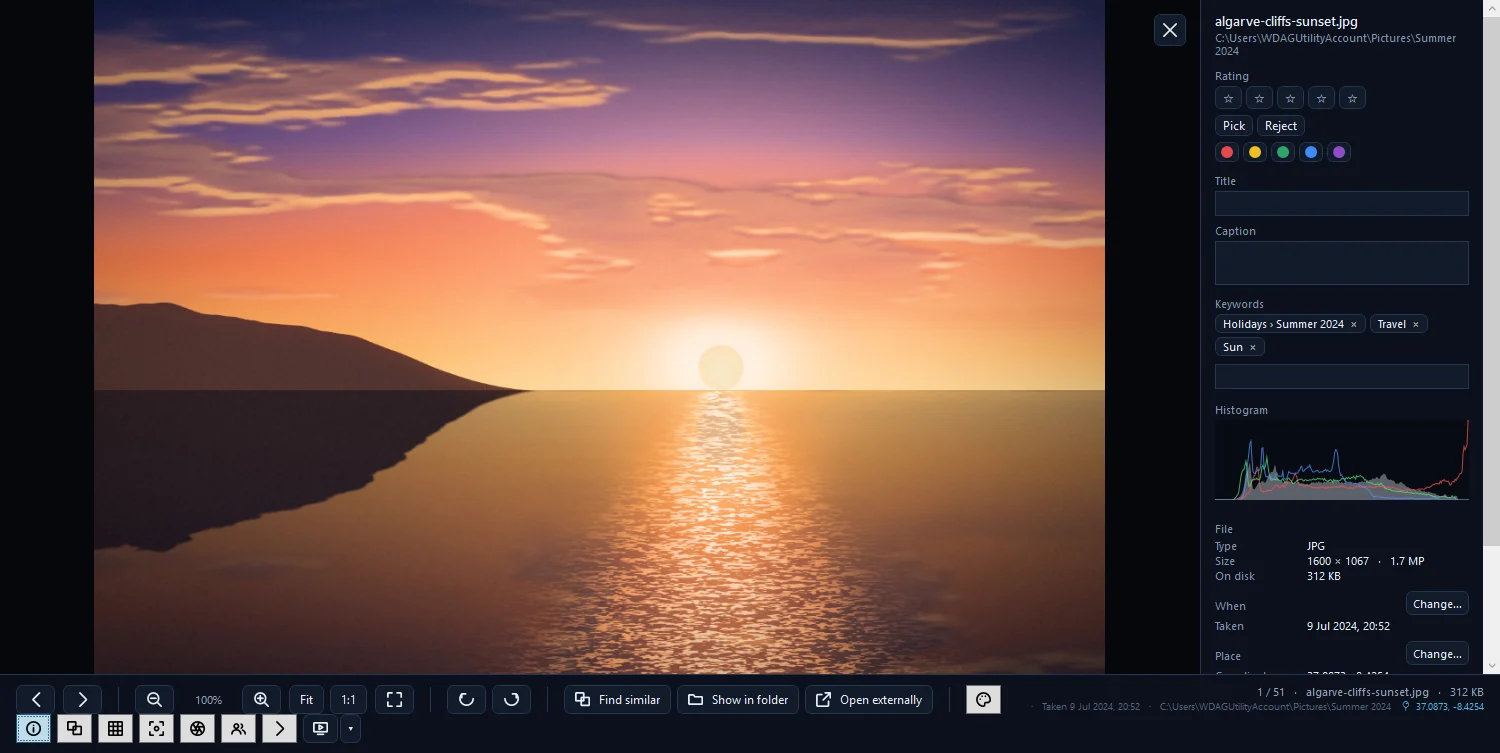
The info panel: rating, labels, title, caption, keywords, file, when, place
Press I or click Info panel to open it beside the picture.

From top to bottom:
- Rating: click a star, or press 0–5. Pick and Reject (P, X, U to clear), and the colour dots Red, Yellow, Green, Blue and Purple (6–9 for the first four).
- Title and Caption: type in the box; the caption is saved when you leave it.
- Keywords: type in Add keyword and press Enter.
- People: faces found in the picture, with "Who is this?" to name them.
- Histogram.
- File: type, pixel size and megapixels, size on disk, and the length of a video.
- When: the date taken, with Change… to correct it.
- Camera: camera, lens, exposure and focal length. This section appears once you've clicked Read camera data under Filters → Camera.
- Place: the coordinates (and the city and country, if you've looked up places), with Change… to set or fix the location.
- Creator and copyright, the Analysis scores, AI tags, text found in the picture and the albums it's in.
Corrections made here, such as a new date or place, are stored in the library and never written into the file.
Find similar, Show in folder, Open externally
Three buttons on the toolbar connect the viewer to the rest of your PC:
- Find similar (S): "Show images like this one". This needs the library indexed for AI search; see how to index your library for AI search.
- Show in folder: opens the folder that contains the file in File Explorer.
- Open externally: opens the file in whichever app Windows uses for its type.
Right-clicking the picture adds Copy picture (Ctrl+C), Open with…, Show on the map, Open in OpenStreetMap, Set as desktop background and Print… (Ctrl+P). For the map itself, see how to see your photos on a map.
Slideshow options
Press F5 or click Slideshow to play from the current picture. Click the small ▾ beside it for Slideshow options:
| Option | Choices |
|---|---|
| Interval | 2, 3, 5, 8, 10, 15, 20 or 30 seconds |
| Transition | Fade, Slide in, Slow zoom, None |
| Caption | None, Title, or the file name, File name, Date taken |
| Shuffle | Random order |
| Start again at the end | Loop the slideshow |
Press F for full screen during the show and Esc to stop it. Videos in the viewer play automatically with Play (Space), Mute (M) and volume; motion photos (JPEGs) from Google and Samsung phones have Play the motion (L) on Windows.
Filmstrip and full screen
Filmstrip (T) shows a strip of thumbnails along the bottom, so you can see what's coming and jump straight to a picture. Fullscreen (F) hides everything but the picture; press F or Esc to come back.
A few grid shortcuts, such as Ctrl+E for export, F2 for rename and Del, don't work while the viewer is open; close it first. For browsing and narrowing the grid before you open the viewer, see how to sort and filter your photo library. The macOS and Linux builds (being finished) have the same viewer, apart from motion photos, with Cmd accepted for Ctrl.
Questions people ask
Does rotating in the viewer save the rotation?
No. The viewer's Rotate left and Rotate right buttons only turn the view. Use Turn left or Turn right in the Adjust panel to keep it.
Where is the EXIF information?
Open the info panel with I. It shows the file type, pixel size and megapixels, when the photo was taken and its place, and the camera, lens and exposure once Read camera data has run.
Can I rate photos in the viewer?
Yes. Use the stars, Pick and Reject and the colour dots in the info panel, or press 0–5 for stars, P, X or U for flags and 6–9 for labels.
Was this article helpful?
Thank you — that is counted, and nothing else about you is. Still stuck? Ask a person.