How to see your photos on a map
Click Map on the toolbar to plot every photo with GPS data, with cluster, trail and heatmap views. A background map needs a tile provider that you choose.

On this page
To see photos on a map in firelet.media Gallery, click Map on the toolbar. Every picture in your library that carries GPS coordinates is plotted as a pin, with clusters, a date-order trail and a heatmap to switch between. The pins are drawn on your PC. A background map appears once you choose a tile provider under Tile provider…; until then the pins sit on a plain background.
What the map shows
The map reads the GPS position your phone or camera saved in each photo or video. Its header counts them, for example "Map — 1,812 of 3,550 items have a location". It plots your whole library, not just what the grid is showing.
- Click a pin to open that picture in the viewer.
- Pictures you've given a location by hand are plotted too.
- The map needs no internet to plot your photos; only the optional background imagery comes from a server.
Steps: see your photos on a map
- Click Map on the toolbar above the grid.
- Click Fit to zoom to everything plotted.
- Scroll to zoom in on an area, or drag to move around.
- Click a pin to open that photo, or press Esc (with the map's toolbar focused) or the ✕ to close the map.

To jump to one picture's spot, right-click its tile and choose Share and print → Show on the map, or right-click the picture in the viewer and choose Show on the map. If it has no GPS data, the status bar says "This picture has no location".
Cluster, Photos, Trail and Heatmap
The tick boxes along the top of the map change how your photos are drawn:
| Option | What it does |
|---|---|
| Cluster (on) | Groups nearby pins into one numbered bubble that splits as you zoom in |
| Photos | "Show thumbnails instead of pins, for what is on screen" |
| Trail | "Join the photos in date order", handy for tracing a trip |
| Heatmap | Shades the places you've photographed most |
Turn Cluster off to see every pin separately. Photos loads thumbnails only for the part of the map on screen, so zoom in first on a big library.
Select area to filter the grid
Select area turns the map into a way of filtering: "Drag a rectangle to filter the grid to what is inside it."
- Click Select area.
- Drag a rectangle around the place you want.
- Look at the grid: the map closes and the grid shows only the pictures inside the rectangle.
If you catch nothing, the map says "Nothing inside that rectangle." From the filtered grid you can make an album, export or start a slideshow. A "map selection" chip appears on the toolbar; click its ✕ to see everything again.
Adding a background map (Tile provider…)
Map imagery comes from tile services such as MapTiler, Stadia Maps or Thunderforest, or a tile server you run yourself. Each has its own terms, and most give you a personal key when you sign up.
- Click Tile provider… on the map.
- Pick an example from the list, or paste your provider's URL template containing
{z},{x}and{y}. - Replace
YOUR_KEYwith the key from your provider account. - Check the Attribution and Maximum zoom, then click Save.

Disable tiles goes back to the plain background. Once tiles are on, the provider receives requests for the map areas you look at, which tells it roughly where you're browsing. Your photos and their positions are never sent.
Place names are separate
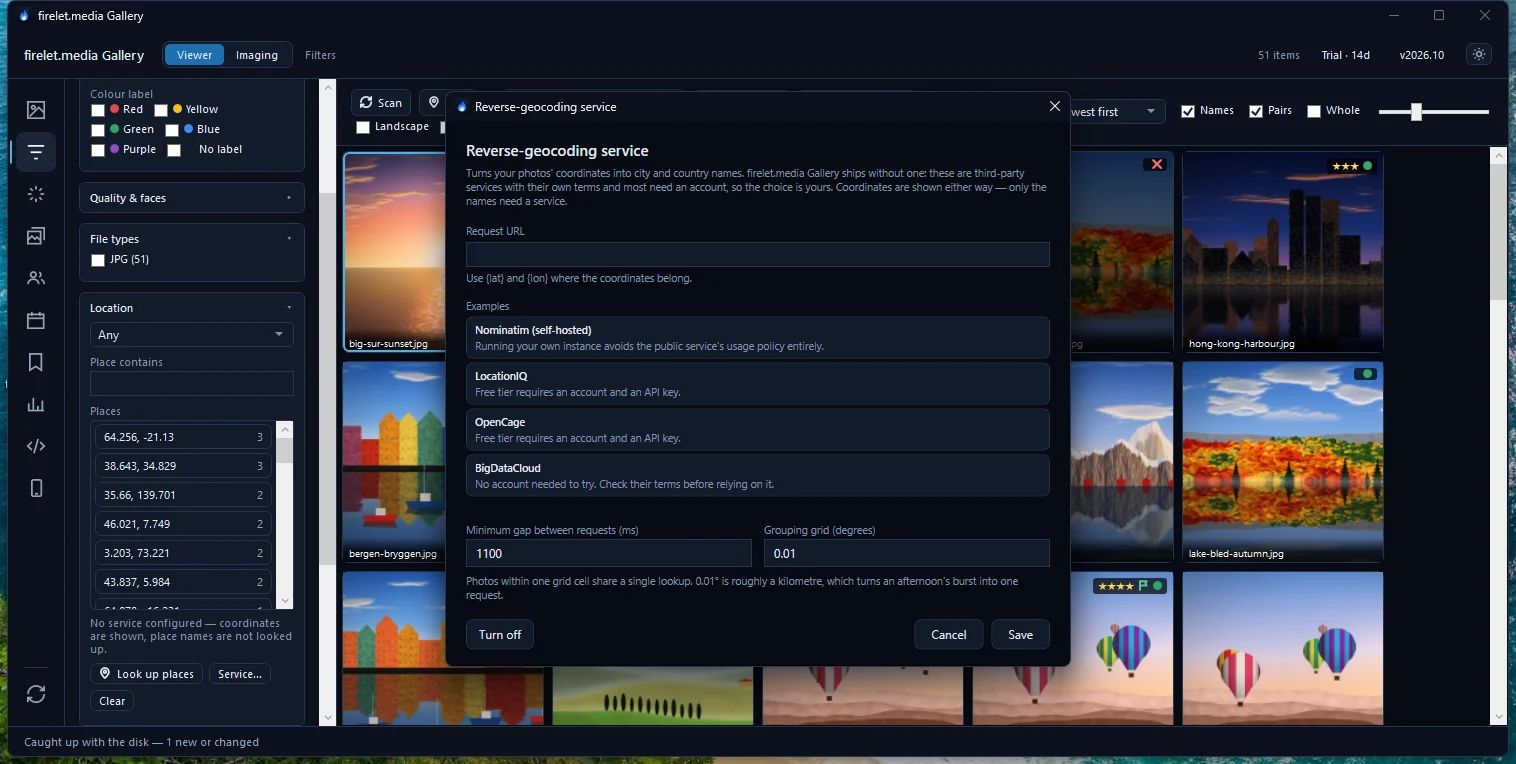
City and country names come from a different, optional service. Set one up under Filters (Alt+2) → Location → Service…, then press Look up places. It only runs when you press that button, and it sends your photos' coordinates, rounded to cells of about 1 km, to the service you chose.
Photos without GPS
Many scanned photos, screenshots and pictures from older cameras have no location. To find them:
- open Filters → Location and choose No location, or
- type
has!=gpsin Advanced query (Alt+9).
To add a location, select the pictures and press Ctrl+Shift+L. You can type coordinates or paste a Google Maps or OpenStreetMap link. The location is stored in the library as a correction, and the file itself isn't changed.
For more ways to find photos from one trip or town, read how to find all your photos of a place and how to sort and filter your photo library. The what firelet.media Gallery sends page lists every connection the app can make.
Questions people ask
Why is the map background blank?
The gallery ships without a tile provider, because tile services restrict use by distributed apps. Your photo locations are still plotted; choose a provider with Tile provider… to add imagery.
Does the map upload my locations?
No. Locations are plotted on your PC. If you add a tile provider, the map images are downloaded from it, which shows that provider the areas you look at.
Does the map need WebView2 on Windows?
Yes. It draws in the Microsoft Edge WebView2 Runtime, already present on most Windows 11 PCs. If it is missing the map says so and everything else works.
Was this article helpful?
Thank you — that is counted, and nothing else about you is. Still stuck? Ask a person.
